My instaphotos

Showing posts with label advice. Show all posts

Monday, November 10, 2014

The (CRAZY) Oil Cleansing Method Experiment done in Malaysia

I think I ruined my skin. 

Oh my goodness. 

Don't stare at the mirror too long.

Why is he staring at me??!!! Is he feeling disgusted by all the pimples on my face??!!!!!!

Yep. That's what I was obsessing thinking about this last few weeks.
If you're here reading this, it means that
1) You have done your research and is considering the Oil Cleasning Method (OCM) ((and I bet you already know it's OCM too))
2) You are wondering what are the complications of doing this method in Malaysia, a hot, humid and extremely polluted country (especially in KL)
3) You don't know which oils are available/cheap (I will tell you where to buy all the items I mention here later at the end of this blog post)

Have no fear! I'll tell you what I did and what the OCM did to/for my skin *moment of truth/dread

I'm thinking that you guys should know what oils and mixture you should use already, but for the sake of my perfectionist (and irritating) nature, I shall lightly touch on the basics of the OCM.

If you have any more questions you can refer to this link from crunchybetty.

What it is:
The Oil Cleansing Method is based on the chemistry concept of "like dissolves like", where by cleaning your face with oils it dissolves the dirty oils trapped in your skin and therefore purifies your skin.

My take: plenty of discussion about the "like dissolves like" thing in the internet, some chemists/ facialists (what do you call people who does facials for you) agree on it but there is a review by Paula's Choice where it actively scoffed at the OCM (yeap. the review still burns in my mind whenever I'm doubting the OCM).

What you use:
The main ingredient for the OCM is the castor oil, who does the deep cleansing/purifying of your pores, followed by a carrier oil, whose main job is to dilute the castor oil so that it doesn't do an overkill of your skin. The carrier oil can be almost any oil under the sun - sunflower seed, grapeseed, safflower, avocado, carrot, seriously guys, anything. As long as it works.

My take: Again, many people either replace the castor oil with sweet almond oil, or don't use it at all. Some just use coconut oil or extra virgin olive oil (That's what it means when you see EVOO on the other blogs' comments) only. Which might be okay for your skin, but take note that some people cannot take coconut oil, EVOO, and jojoba oil. 

What mixture you should use:
It is believed (and repeated) by many users that the ratio for different types of skin matters. The combo is usually:

Dry Skin: 10% castor/sweet almond oil: 90% carrier oil
Normal/Combination Skin: 20% castor/sweet almond oil: 80% carrier oil
Oily Skin: 30% castor/sweet almond oil: 70% carrier oil

My take: Again, many variation on this. Some people use 1:3, 1:1, or 1:2, instead of the percentages mentioned above. Some even use 1:1:2:1 (but that's for higher level OCM users, which means that if you have not started or have not lasted on the same mixture for more than 2 weeks, you should keep it simple - 2 oils only! Yes I'm talking to you. Keep those itchy fingers away for a little longer) Plus, there is this lady who tried the OCM and said that there is no such thing as dry/oily skin, it's just the way your skin has reacted to the products you've used previously.

How you should do it:
Massage oil on dry face (after making sure your hands are clean. Oils get infected by bacteria, there goes your face. Keep it clean! Same goes for your oil bottle.) for about 2 to 5 minutes. Steam your face, either by getting a super expensive steamer, or get microfiber cloths and place it under hot water (not too hot, or there goes your face again) then place the cloth over your face to steam it. When the cloth gets cold, wipe your face. Rinse and repeat for 3 or 4 or 7 times (I'm super kiasu wan).
Some do the OCM every night, some every other night, and some once a week.

My take: Get the microfiber cloths lah. It's cheaper. Get 4 so you don't have to worry about not having a clean laundered one everyday. I'm currently doing the OCM every night because firstly my skin is just recovering from the initial purge, and secondly I worry about getting my sunblock off my face every night. When your skin has recovered and is looking pretty nice, please start thinking about doing it every other night or so.

MY experience:
If you guys read my blog you'd know that I use acne.org previously to clear off my really really bad breakout a couple of years ago. The last year and more I had clear skin and felt really awesome about it. There'd be the odd pimple here and there occasionally, but that beat having pimples all over your forehead and cheeks and chin right??

Then came the last month which played havoc to my skin due to stress (from work I guess), traveling around (to Ipoh then to Johor for work then back) and having my period. My skin started to have a light breakout. And a reader emailed me to tell me about the effects of using too much Benzoyl Peroxide (treatment product from acne.org) so I decided to do some research on natural products.

After an extreme obsession about researching the OCM, I decided to play it safe and get castor oil and grapeseed oil (cuz grapeseed's not a nut oil and some people get allergic to nut oils). My first headache was where to get castor oil? I went to town and visited an indian shop to get one (it was like, RM 3.50 or something. Super cheap!) then I went to Tesco and visited the oil section. Most of the oils mentioned are sold there and I grabbed my grapeseed oil with glee. Next up, microfiber cloths. Tesco, Giant and Jusco don't sell them, so finally I got it from our superstar Daiso. 2 cloths for RM5!

The first week (10% castor oil 90% grapeseed oil) with moisturizer of jojoba oil
Then came the moment of truth. The first week I started the OCM, I left my cloths at home (I rent a place somewhere else and only go home every weekend) Damn. SO I decided to just wing it and wash the oils off with my Simple Gel Cleanser. Bad choice. In the Nitty gritty about OCM, it says not to combine natural and chemical products because it will confuse your skin. My breakout worsened by like, ten thousand times. I was having pimples on my cheeks (really horrible ones), my forehead (lots of tiny bumps) and my chin (seriously eww).

It was basically a confusing moment for my skin cuz I didn't know what to wash my face with in the morning, it was worsening and what do I use as moisturizer??!

I ran (drove lah how to run in KL) home to grab my microfiber cloths, bought lavender essential oil and lavender floral water, and decided to DO. IT. PROPERLY.

I also switched from grapeseed oil to sunflower seed oil (seems that sunflower seed oil is less pore clogging compared to grapeseed oil. I wasn't sure whether the grapeseed oil was the culprit, but I just wanted to play it even more safe. Sunflower seed oil has a comedogenic rating of 0). So back to Giant I went.

The second-third week (25% castor oil 75% sunflower seed oil and 3 drops of lavender essential oil)
I stuck to this for two weeks, where I saw my skin worsen first. There was tiny whiteheads all over my skin, and some really huge bumps (i think it's called cystic acne bumps). I also felt that my skin was really dry because every night I came out of the shower I felt that my skin was really tight.
In the mornings I'd just run water over my face then use the lavender floral water like a toner over my face, dab on my sunblock and off I'd go.

At the end of the third week of OCM, I noticed that my pimples were starting to go off, but I wasn't sure whether this was due to overdrying (the pimples area was peeling) or because it was getting better. My skin started to get smoother, pimples got well faster and left barely any scars, so I decided that it was time to modify my potions. (Stick to it for at least 2 weeks!)

Fourth week (10% castor oil 45% jojoba oil 55% sunflower seed oil and 5 drops of lavender essential oil)
Also, I got Vitamin Cs in the morning and Evening Primrose Oil in the evenings. The fourth week is happening right now :D
Skin starting to look much better, and pimples going off. The thing that confuses me is that some bumps still continue to appear though, but I'm waiting to see what happens.

People commenting on your skin sucks. I forgot how it felt to be feel so small and awkward and anxious every time someone comments on how many pimples you have and start judging based on what you eat, what products you use and your lifestyle choices. As if by "drinking more water" my skin would magically clear up. And I happen to be around a whole bunch of (mostly guys) people who are insensitive to the woes of the skin. sigh.

However, do note that lifestyle choices are important! It seems that your diet is also important even after you start the OCM.

THE purge
For those who aren't sure (I certainly wasn't) how to differentiate between the purging of OCM and a regular breakout, purging comes with lots of whiteheads (clusters!) and occasionally (I think) some cystic acne. With a regular breakout it's everything else.

MY plan
I'm looking at getting shea butter as a moisturizer and maybe rose floral water as a morning cleanser. I feel weird without using a moisturizer for so long, and rose floral water is much more hydrating to the skin :)

Where to get:
Sunflower seed oil/grapeseed oil: Just visit any Tesco/Giant hypermarket and go to the oils aisle
Microfibre cloth: 2 for RM5 at Daiso
Castor oil: RM5 at an Indian Grocery shop or visit lemongreen2u (though I have never bought from this site before)

Final verdict (after about 8 weeks)
OKAY the OCM method is just not for me lah. Now am (painfully) recovering from my breakout now. Sucks having skin that everyone comments on with a horrified face -________-

SO guess what I'm sticking back with my acne.org treatment, while using organic aloe vera gel + jojoba oil as a moisturizer :/ SIGH. Oh well, now I know one thing that doesn't work for my skin.

Not gonna post pics cuz it's really horrible!
Cheers -___-


Wednesday, May 28, 2014

Malaysia branch Musee Platinum Tokyo's review, year 2014

This is a bought and paid for package from Musee Platinum Tokyo @ Malaysia. 
The title's like that cuz I didn't find any reviews for this year, especially when I was doing research before I went.

UPDATED: The moment I read XiaXue's blog post on hair removal in Singapore by Datsumo Labo, my brain was totally screaming "pleeeeease come to Malaysiaaaaa!" and trying to send telepathy messages to their management team so that they will open a branch in KL. 

Fuzz, and me, don't go well. I hate fuzz, fuzz hates me. Simple as that.
And I'm sure that it is pretty similar for all girls too.

Little did I know that in Malaysia we have our very own brand that's good and very worth it!
People, let me introduce you to.....


The marquee @Farenheit that I went to
I have 2 friends who bought a groupon deal with Musee Platinum Tokyo last year when they offered their underarms package at RM278 for unlimited sessions for, get this---your whole lifetime.
This means that after the obligatory 12 sessions for hair to die off  growth to stop completely, maybe one day after an extraneous spurt of hormones, you grow a little bit of fuzz.

"No problemo", says Musee. "Come over and do sessions over and over and over again till you are satisfied!"


Great, right?

What Musee Platinum Tokyo is offering now:

I love the term "tax included"
(If you only want to read about the process of hair removal, skip all the pictures and go to the bottom)

This is the package I signed on (for now, I'll explain later how the underarm package can totally be evolved like Pokemons) with a special promotion with their Facebook page, bringing it to RM279.
(Liking their page and then going for an appointment by the 31st of May, 2014)
((But it's kinda redundant mentioning it now because today is the 31st of May, 2014))


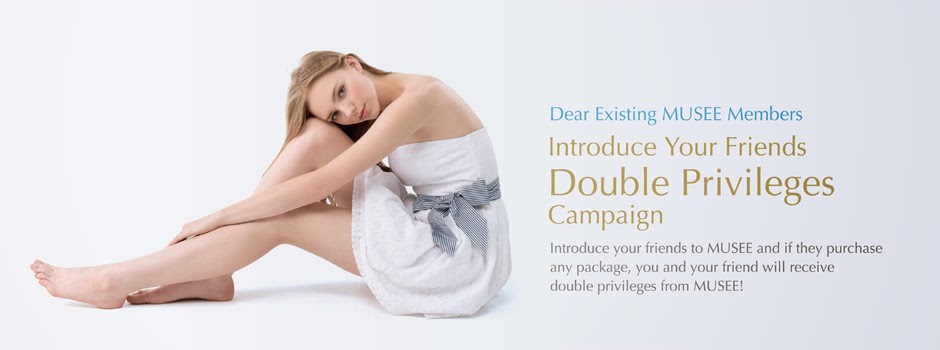
Now because I mentioned just now that I have friends who are already on this package, I get special privileges when I sign on any packages. Actually, both of us get special privileges when I sign on any packages. 

All you have to do is to tell them you were referred by a friend, bring her ID number (definitely a her, cuz Musee Platinum Tokyo does not cater to men as of yet, neither do they have plans to) and tell them the ID number during your first appointment.


So, depending on which I would prefer, I'd get a free session on any large area (calves, arms, thighs, back) or RM300 off if I sign on any packages other than the underarm hair removal.Or, you could read about it here. It's unlimited so you can save up as many friend referrals to you and splurge on a package at one go (you can save all of the RM300 vouchers up to a year).

Stuck to the wall at the Musee outlet :D
Now, there is also something complicating and mind-blowing to know about through this friend referral campaign that they've got. This is my formula: (I'm only going to say it once so please listen carefully, or you could just read up over and over again)

Assuming that when you signed up with a referral ID, you have 1) a RM300 voucher. 


 Now, you have also a birthday voucher which you get during your birthday month after you join, which entitles you to 2) a RM200 voucher (can also be saved up to a year, meaning to your next birthday).

Also, when you sign up to any large area (equals to 2 small areas) they throw in the unlimited underarm hair package free, which means that now you have 3) another RM288 to void.

This brings up to a total of 1) RM300 + 2) RM200 + 3) RM288 = RM788 off for the large area hair removal package you sign up on!

Plus, the more friends you refer, the more RM300 vouchers you get. MUAHAHAHAHAHA. 

The beautician told me that they were some customers who saved up so many within the year that they only paid a few ringgit when they signed up to the package. 

What? you gotta be kidding me

 OKOK enough of the deals and on to the process (yeap this is a crazy ass long post).

After the 45-min-long consulting session, I was brought to the changing room to change into a camisole. I chucked everything into my locker and that's why I have no pics, just have to entice you with my wordy descriptions (or steal pics from other blogs...depends on my mood).

Suggestion 1: Wear pants so that it's easier and you don't have to change into the kimono robe
Suggestion 2: When you call to make your appointment, specify that you'd like to do the treatment together with the consultation. Or else they'll make you wait and go another time. 

After changing, I was brought to the treatment room. There will always always always only be you and the single beautician inside the room and no one else. I know, cuz I asked. My friend wanted to go in and see. 

First, they prep the area: Covering youe eyes with tissue and a goggle like eye cover, cleaning, wiping, and also shaving excess fuzz. 
Next, they apply this super cold gel like thing to the target area. 
Followed by this deodorant like tube to buzz off the target area's hair follicles. 
All you will hear is "bzzzz! bzzzz! bzzzz!" with flashes of orange lights through your eye cover. 

After this, a wiping off followed by applying ice packs to the area for about 5 minutes.
Finally, moisturizing cream is applied and you're a free woman!
It took all of 15-20 minutes -___-
Pain level: 3.5/10 

I always thought that it would take longer, considering the years of my lifetime spent fighting with fuzz. 

Instructions for after care
 Anyways! Think about it, less than RM300 and your fuzz will be gone (well, underarm fuzz la to say the least). I have no regrets signing on, and I can tell you that you won't have any too.


Go for it! use my ID: 

8104 6969


Musee Platinum Tokyo branches:
@Curve: 03-7728-3988
@Fahrenheit 88: 03-2110-6188

Cheers!

UPDATE:
Just came back from my third session, and decided to brief you all :)
Hair is growing really slowly now, and the past month I think I only needed to shave like twice. HOHOHO.
Also, I am now signed on to 12 + 1 large session package which costs originally RM 4800 but after the promotional 20 + 15% discount only came up to RM 2448. Due to the fact that I have 7 referrals, each containing a RM300 off the package, plus the original underarm package, plus my birthday treat promo, it came up to:

RM 2448 - RM2100 - RM288 = RM60

I used my birthday promo to get one more free session instead of blowing a RM200 worth of birthday treat on my leftover of RM60 which I paid by cash. (Sorry if it sounds confusing. Comment below and I'll try to explain if you need help yea)

NOTE: Starting November, each friend referral will only be worth RM150 instead of the original RM300. This is part of the reason why I signed on to this package now instead of my original plan of holding out till the expiry date of one year (now half a year only).

Plus the underarm package is now giving out their really cool and totally harmless shavers free! I want one too... *wistful

Anyways, feeling contented now, cheers!

Sunday, December 29, 2013

Mr Lens & Me

 A Butterfly Project

and

 Blogging experience

I don't know about you guys, but I've always had trouble finding a legitimate (by that of course I mean cheap, good and with plenty of variety) optometrist to buy contact lens. I've always been the type to buy the cheapest and most convenient lens available so I just buy whatever contact lens that's not too dodgy - Acuvue, Air Optix, Freshcon, Freshlook, Soflens 38 (& 58 too I think, izit the same?) but I am aware that there are plenty that I've never tried, so here comes both Butterfly Project and Mr Lens into the picture.

As a blogging project, I was given the choice of choosing 2 contact lenses from Mr Lens. Giddy with excitement and enthusiasm, I immediately went to their website to choose mine.

My choice - TADAH! Colorvue Starburst in grey and Colorvue 3tones in green. I always buy my color lenses in grey and since I have two choices I selected green also for fun *claps hands in glee

it comes in a box with 2 capsules for your lens (this one is hazel for sistah <3)
If you're as impatient a girl as me (as I think all girls are for new stuff) then you'll be glad to know that Mr Lens offers free delivery to the Klang Valley and KL area, plus they have their own delivery team who are in charge of delivering ONLY Mr Lens products. I got mine 3 days later, if I'm not mistaken ;) Now that's what I call good service!

It comes like this:

two boxes of contact lenses, your receipts, and the customary brochures
about their services
Close up of my eye after I wore it:

looks a little blur cuz I zoomed and cropped it, but you get the gist -
this is Colorvue in Starburst Grey
I reckon that it'll look better with makeup and the whole she-bang, but a little word of advice: this contact lens is supposed to be worn for 3 months, but if you're like me who wears these lens almost all day every day of the week, tune down the expiry to one month please, or else you'll hurt your eyes. Color lenses are always more harmful to our eyes.

What Mr Lens offers: Up to 50% discount on your regular contact lenses, and speedy delivery times.
For the same products and half the price, why not take a chance on Mr Lens?

Cheers!


Sunday, November 3, 2013

My encounter with Sky Fruit (向天果)

This was one of the more traditional "supplements" that I was consuming when I had my acne episode earlier this year. At the same time that I started Acne.org, a family friend recommended that I try this "miracle seed" that she had her maid try when the maid had skin problems.

Well, I was skeptical at first. Two seeds per day and my acne will be gone? Tipu (lying) la. Where got so powerful wan? Admittedly around that time I kinda lost heart about all these consumed pills and what-nots already after my previous experience with antibiotics and stuff from my dermatologist in Ipoh (read here).

So my lovely daddy got one coconut-like ball of the "fruit" from the family, processed it for me and put all the seeds into a container specially reserved for me.


Yup, all that for me. And it's not the only container that I got! Daddy was very enthusiastic about these seeds and went to get so much more for me that when I stopped consuming the seeds I had about two huge containers left :/

It was only yesterday that after I went with the sistah and mummy to visit the family friend again and her making such a fuss over my healed and kononnya glowing skin that I went to google the Chinese name, "向天果". It's English name is called Sky Fruit and it has SO MANY medicinal benefits!

Lowers cholesterol, good for glucose levels, anti-carcinogen (cancer), good for sperms, heals asthma, promotes healthy blood circulation, anti-inflammatory, reduces risk of heart disease, and only a minor part about skin problems, and it worked so well for me!

Guess what? I'm back to consuming the seeds already *grin

So here's how you consume the "seeds" or fruit:


Take 2 seeds every morning (some links recommend a couple every morning, noon and night but I only took it once a day) and prepare some water handy. Trust me, you need it handy!


Make a clean break through the middle of the seed and pop out the white seed. 


Now you have 2 seeds in your hands. The shell breaks easily and cleanly. 


Smash it into little pieces, pop them into your mouth, grab water, and swallow!

Try not to drag out the process because it is really really bitter. If you're feeling brave, chew the seeds instead of breaking them beforehand. I DARE YOU.

Cheers!

Showing off my skin <3

Thursday, May 16, 2013

Virtual makeover

This is a continuation of my previous post where i blogged about Mary Kay's One Woman Can contest, and this is the Virtual Makeover app that is included in their website, at marykay.com.my.

anyways, this is so fun! I always thought that bluuurgh not fun one, also not my real face lol.
But after trying it out yesterday, i was HOOKED.

The app lets you upload your own photo (after joining membership, no expense required don't worry), or you can choose some other models' face. There's Eurasian, Guai Lou face, dark skinned, and also Asian for us. 

Nah my before and after pictures. See the tiara?? Sparkly sparkly tiara *love*.

Do take note that my picture before had on makeup already, some mascara and eyeliner and the app tells you to choose pictures with no makeup and in good lighting. I chose this because this was one of the few photos i have with my head straight and nice.

So as you can see, I grew cheekbones in the "after" photo, using the blusher to make my face slim haha. Lip color is another change, though it was sad that the app lacked eyebrow brushing up.
That's just a small disadvantage lah.

You don't HAVE to buy their makeup products, just experiment to see which colors suit you and maybe you can go and buy other makeup with simlar colors? Very helpful when deciding on colors to buy. 

Just a very short one, that's it lah!
Cheers! and tata :D

Tuesday, May 14, 2013

you're still using badgeplz.com ahh?

Out already lah you!

hahhaa. I'm just rubbing you up a little! oh well. Remember when we used to have badgeplz.com on our blogpages? Pfttttt. WELL. It KA-PUNKKKK-ed.

Don't know what happened to it? But I loooooooved showing my instagram photos on blogger, and then after awhile I opened my page to find this:


Aduiiii. Potong steam la wei. So now when I want to see my photos I see this instead?

I searched around the net, saw some other blogs having the same problem as well, but nobody seemed to be solving it. I took down the badgeplz html and i found that others also did the same thing. But i was NOT happy.

So just now I searched the net again and found this:


Snapwidget

It's pretty much similar to badgeplz but more awesome in the sense that IT CAN WORK -.- (imagine the quality of bad apps that makes you like whichever apps just because they work. sigh).

So what you do is that you go to "get started" (in case some of you are blur, not trying to be Pippa Middleton):

oh and yes I googled how to screenshot as well. Keep forgetting how to!
There's my username over there. The funny thing I thought about was that you can actually use somebody elses' username which means that you get to use their photos, so haha if you want to play a prank go ahead. Those who want to use my username just let me know first ok hahha!

So you see? Insert your username, select your widget type (grid is like what i have here), thumbnail size (normally 200 will do? But I like mine super huge but you can also see that the number of photos I can put in a row is affected, I can put only 3, unless I want another row), layout (row x number), photo border (definitely yes!) and other advanced stuff.

Next, preview, and if you like it (the major thing is only the size of it) just get you widget!


Include it in your layout (add in html if you don't have one in the first place) and that's it! I like it because it's pretty much easy and I get to put pretty photos at the top of the page again :D

No more bland layout!
Cheers!
goodnight!